
Thinking about starting a blog in 2025? You’re in the right place.
When I first started blogging, I had no idea what I was doing. I wasn’t sure if anyone would read my posts, and honestly, I didn’t even know if I’d stick with it.
But fast forward to today, and my blog has turned into something way bigger than I ever imagined. It’s not just a creative outlet, it’s also a source of income and a way to connect with people all over the world.
If you’re feeling overwhelmed or unsure where to begin, don’t worry; I’ve been there, too. The good news? Starting a blog is easier than you think, and you don’t need to be a tech expert to do it.
In this step-by-step guide, I’ll walk you through everything you need to know to launch your own self-hosted WordPress blog the right way.
Disclosure: This post contains affiliate links, so if you make a purchase, I’ll earn a commission at no extra cost to you.
Getting Started the Right Way
Starting a blog is one of the easiest and most affordable ways to build an online presence. It can be a hobby, a side hustle, or even a full-time business if done right.
But I get it, when you’re just starting, it can feel overwhelming. What should you write about? How do you set up a blog? And most importantly, how do you turn it into something profitable?
Before we dive into the details, let’s go over some of the most common questions that every new blogger has because chances are, you’re wondering about the same things too.
What is a Blog?

A blog is simply a website where you share your thoughts, knowledge, or experiences through written posts. It’s like an online journal but with the potential to reach thousands (or even millions) of people worldwide.
When I first heard about blogging, I thought it was just for writers or tech-savvy people. But I quickly realized that anyone can start a blog, whether you want to teach something, document your journey, or even make money from it.
The main goal of a blog is to provide value to readers. It can be informative, educational, entertaining, or even personal.
The best part? Your blog can be about anything you’re passionate about: travel, fitness, finance, food, or even your daily life experiences.
If you have something to say and want to share it with the world, a blog is the perfect way to do it.
Why You Should Start a Blog?

Starting a blog might seem like just a fun hobby, but it can be so much more than that. Whether you want to share your experiences, help others, or even make money online, blogging opens up endless possibilities.
Think about it: Every day, people search for answers online. Maybe they need simple fitness tips, advice on starting a business, or step-by-step guides for learning a new skill. If you have knowledge or experiences to share, someone out there is looking for it.
Let’s say you’re passionate about photography. By starting a blog, you can share tips, tutorials, and personal experiences that help beginners take better photos.
Over time, you build a community, gain readers who trust you, and even find ways to earn from your content.
The best part? Blogging allows you to do something meaningful. Instead of just scrolling through social media, you can create something valuable, connect with like-minded people, and turn your passion into something bigger.
Can I Start a Blog Without Any Technical Experience?
Absolutely,
You don’t need to be a tech expert or know how to code to start a blog. When I started, I had zero technical skills.
I didn’t know how to set up a website, and the idea of managing a blog seemed complicated. But guess what? It turned out to be much easier than I expected.
These days, blogging platforms like WordPress make the whole process beginner-friendly. With just a few clicks, you can set up your blog, customize the design, and start writing without touching a single line of code.
And even if you do run into challenges, there are plenty of tutorials, guides, and tools available to help you out.
In this guide, I’ll walk you through the process step by step, making sure everything is easy to follow. So don’t let technical worries hold you back. If I could do it with no experience, so can you!
Do I Need to Be a Great Writer to Start a Blog?
Not at all. You don’t have to be a professional writer to start a blog. In fact, blogging is more about sharing your thoughts and experiences than writing perfectly structured essays.
When I first started, I wasn’t confident in my writing. But I quickly realized that blogging isn’t about using fancy words or perfect grammar; it’s about being yourself, sharing valuable insights, and connecting with your audience.
Think of it as having a conversation with a friend. As long as you’re clear, helpful, and genuine, people will appreciate your content. And just like any skill, the more you write, the better you’ll get.
So don’t overthink it; just start writing, and you’ll improve along the way.
Can I Make Money with My Blog?
Yes! Blogging can be more than just a creative outlet, it can also be a great way to make money. But here’s the key: your blog needs to provide value to your readers.
If people find your content helpful, they’ll keep coming back, and that’s where the money-making opportunities come in.
There are several ways to monetize a blog. You can earn through affiliate marketing (promoting products and earning a commission), sponsored posts (brands paying you to feature their products), selling digital products (like e-books or courses), or even placing ads on your blog. Over time, as your audience grows, companies may even approach you to collaborate.
When I first started blogging, I had no idea how to make money from it. But once I focused on creating useful content, opportunities started coming my way. The more valuable your blog is, the easier it becomes to turn it into a source of income.
We’ll dive deeper into these strategies later in the guide, but for now, just know that making money from blogging is absolutely possible; you just have to start.
How Much Does It Cost to Start a Blog?
Starting a blog doesn’t have to be expensive. In fact, you have two options: you can start a blog for free or invest a little money to build a professional, money-making blog.
Free blogging platforms exist, but they come with a lot of limitations. You don’t have full control over your site, you can’t monetize it properly, and you might even lose your blog if the platform shuts down.
That’s why I always recommend starting with a self-hosted WordPress blog; it’s affordable and gives you complete ownership.
The good news? You don’t have to break the bank to get started. With a small investment of around $35 to $50 for your first year, you can cover the basic costs like domain registration and hosting.
This guide will show you how to keep your expenses low while setting up a blog that has the potential to grow and make money.
If that sounds good, let’s move on to the next steps.
Start Selling Online with Shopify
Learn how to set up your store, manage products, and start selling online effortlessly.
Step 1: Choose the Right Blog Topic
The first step in starting a blog is deciding what you want to write about. Your blog’s topic, or “niche,” plays a big role in its success. But don’t worry, you don’t need to have it all figured out right away.
If you have a business, your blog should focus on topics related to your products or services. This way, you can attract potential customers and grow your brand.
If you’re an individual, choose a topic you genuinely enjoy talking about. Blogging is much easier (and more fun) when you write about something you love.
Ask Yourself These Two Questions Before Choosing a Blog Topic:
- Am I passionate about this topic? (Can I see myself writing about it long-term?)
- Do other people care about this topic? (Are people searching for it online?)
A successful blog is built on the balance of passion and demand. If you enjoy the topic and others find it valuable, that’s a great sign.
For example, if you love cooking, you can start a food blog where you share your favorite recipes, cooking tips, and meal prep ideas.
By understanding what your readers want, like quick dinner ideas or healthy meals, you can create content that keeps them coming back.
Popular Blog Topics to Consider:
- Beauty & Fashion
- DIY & Crafts
- Health & Fitness
- Home Decor
- Education
- Food
- Travel
- Technology
- Parenting
- Lifestyle
- Finance
The key is to just start. Don’t overthink it; pick a topic you enjoy and learn along the way. Your blog will evolve as you go.
Step 2: Choose the Right Blogging Platform
Before you start writing, you need a blogging platform, the place where your blog will live. Think of it as setting up a kitchen before cooking. You want a space that’s reliable, easy to use, and flexible enough to grow with you.
There are many blogging platforms out there, each with its pros and cons. Some are beginner-friendly but come with limitations, while others offer more control but require a bit of learning.
After trying different options, I found that WordPress is, hands down, the best platform for blogging. It’s free to use, highly customizable, and gives you full control over your content. That’s exactly why I built this blog using WordPress.
Step 3: Get the Best Web Hosting & Domain
Now that we’ve chosen your platform, it’s time to set the stage for your blog to go live. A domain name and web hosting are essential for this step.
There are many reliable web hosting providers, but Hostinger is a popular choice for beginners. They offer affordable hosting plans, a free domain name for the first year, and seamless integration with WordPress.
This means you can set up your blog quickly without any technical hurdles.
→ Click here to head over to Hostinger and hit the “Claim deal” button

I recommend checking out the link below, where you can have an additional 10% discount on Hostinger’s already discounted prices by using my promo code.
Once you click on the link, you’ll be directed to Hostinger’s page. From there, click on the “Claim Deal” button, which will take you to their hosting plans.
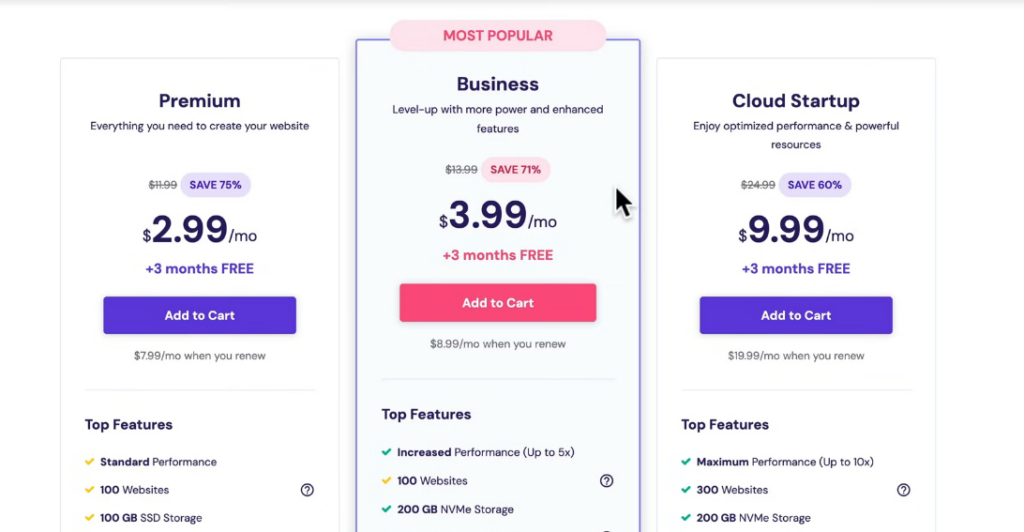
When choosing a hosting plan, I suggest going with either the Premium plan or the Business plan. The key difference between these two is the CDN feature included in the Business plan.
This feature stores your website’s data on multiple servers around the world, which improves your site’s load time and overall performance.
If you’re aiming for the best performance, the Business plan is ideal. However, if you’re on a tighter budget, the Premium plan is still an excellent choice.
For this guide, I’ll use the Business plan and proceed by clicking “Add to Cart.”
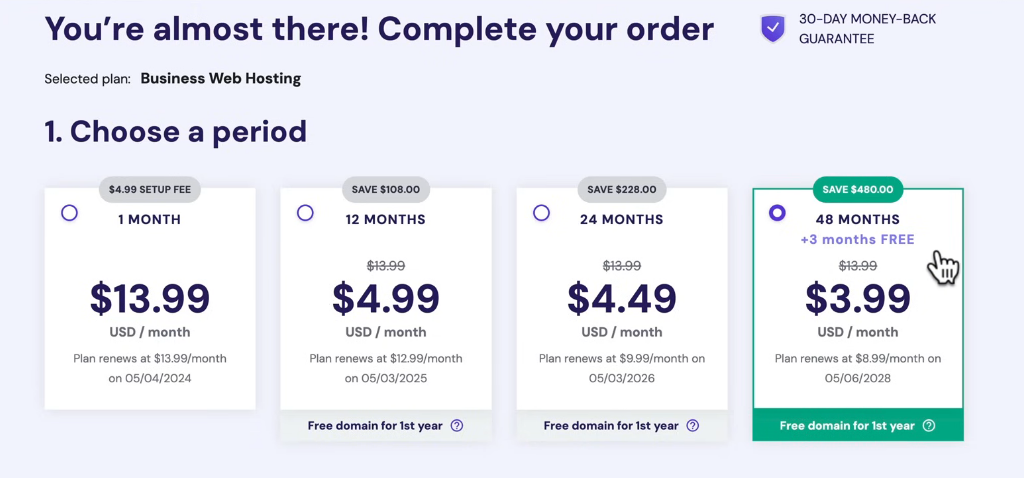
Next, you’ll need to select your payment period, which determines how many months of hosting you pay for upfront. Generally, the longer the payment period, the lower the average monthly cost.
The best value comes with the 48-month plan, which averages out to just $3.99 per month for four years. After the initial term, it renews at $8.99 per month, which is still competitive.
Just keep in mind that the one-month option doesn’t include a free domain for the first year and adds a $5 setup fee, making it less ideal.
Start your Blog with Hostinger
Meet Hostinger, one of the popular web hosting platforms in the world, founded in 2004 with almost 29 million customers worldwide trusting their services.
Get startedFast and secure web hosting
The 48-month option, however, is a solid choice for those looking for affordability and flexibility.
For demonstration purposes, I’m selecting the 12-month plan. Once you’ve made your choice, the next step is creating your account.
Simply enter your email address and choose a secure password. After that, select your preferred payment method, fill in the necessary details, and click “Submit Secure Payment.”
Here, just click on the Hostinger logo at the top and it will take you to your H Panel. Now it’s time to set up your domain name, which will serve as your website’s address.
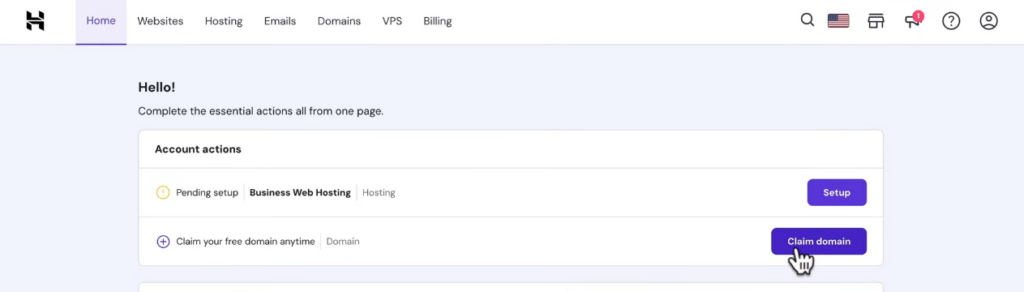
Since Hostinger includes a free domain for the first year with plans of 12 months or longer, you can claim it during this step.
Click on “Claim Domain” and search for a name that represents your website. If you’re building a personal site, yourname.com is a great option.
For businesses, use something like yourcompanyname.com. Keep the domain short, simple, and memorable. If your preferred name is unavailable, try alternative extensions like .net or get creative with slight variations.
For example, if digitalagenda.com is taken, you might try digitalagenda.me.
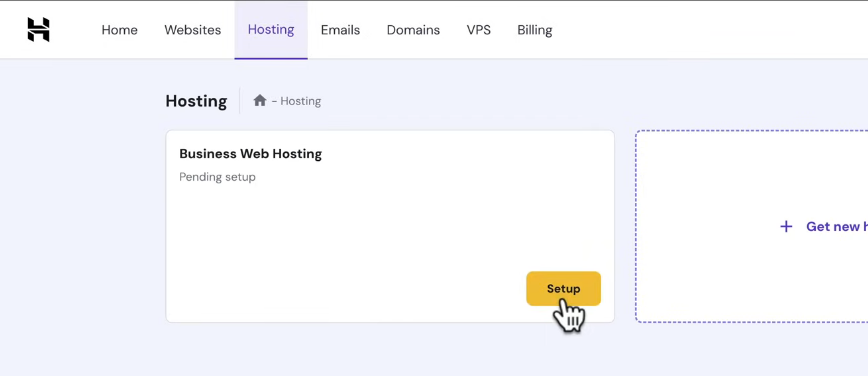
Once you find an available domain that fits your needs, go ahead and claim it. With your hosting and domain in place, you’re ready to start building your website. From the top menu, switch to Hosting, and click setup to set up your website.
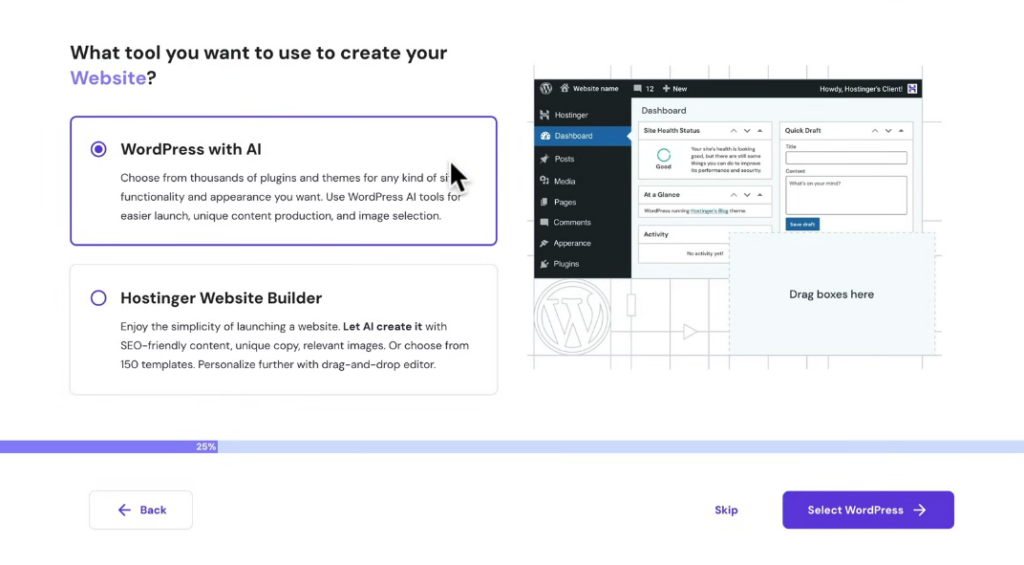
Here, you can choose from WordPress or the Hostinger website builder, so choose WordPress as we’re building our website with a popular CMS , WordPress. Then click Select WordPress.
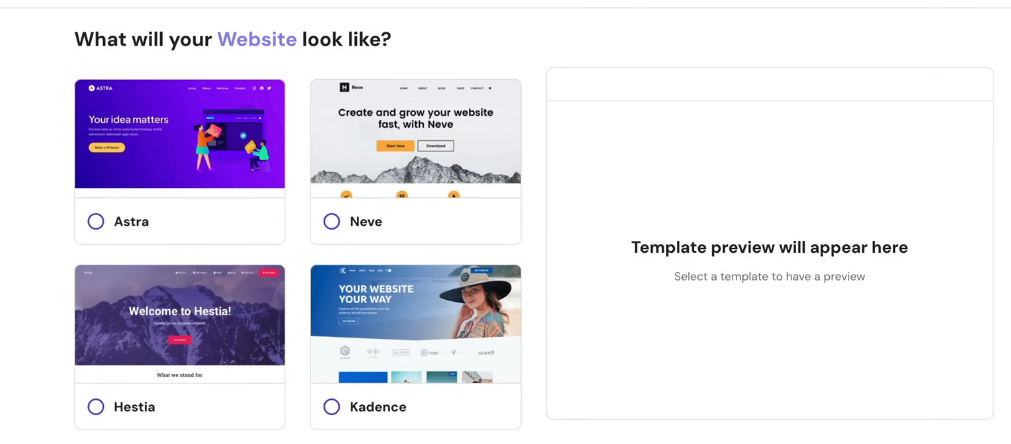
Now you’ll need to set the password for your website and pick a WordPress theme, now you might be thinking what the Theme is. This is a layout template of your website. So, choose one or skip this step for now, and it
Next, access the WordPress dashboard by clicking “Admin Panel” in the Hostinger dashboard. This is the back end of your blog, where you’ll make changes and updates.
To quickly access it in the future, type your blog URL followed by /wp-admin in your browser. Bookmark this link for easy access.
Step 4: Get Started with WordPress
Before we dive in, keep in mind that you’ll need two sets of login details:
- Hostinger login details: These are used to manage your hosting account, renew your hosting plan, and make any technical changes.
- WordPress login details: These are used to access your WordPress admin dashboard, where you’ll write blog posts, customize your site, and manage everything.

To log in to WordPress, simply:
- Go to your Hostinger dashboard.
- Click on Manage WordPress under your hosting account.
- Select “Edit Website”, and it will take you straight to your WordPress dashboard.
Or, you can go to yourdomain.com/wp-admin and log in using the WordPress credentials sent to your email.
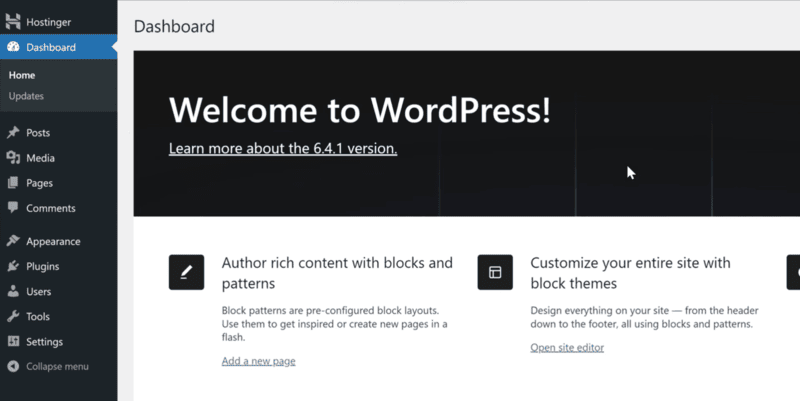
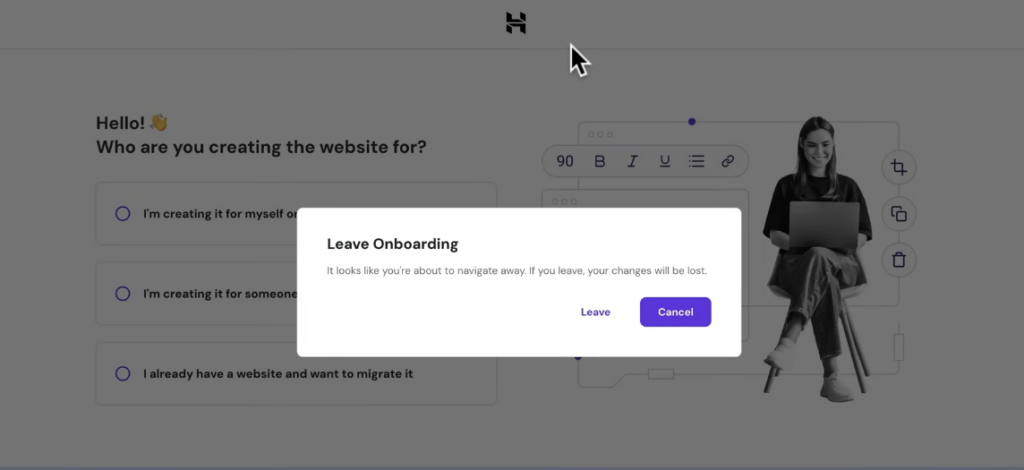
And just like that, welcome to your WordPress Dashboard. This is where the magic happens. Let’s move forward and start customizing your blog.
It might feel a bit overwhelming at first, but trust me, once you get the hang of it, it’s much simpler than it looks.
I highly recommend checking out my WordPress beginner’s guide if you want to dive deeper and fully understand how everything works.
To help you get started, here are some key settings to focus on to make sure you’re on the right track:
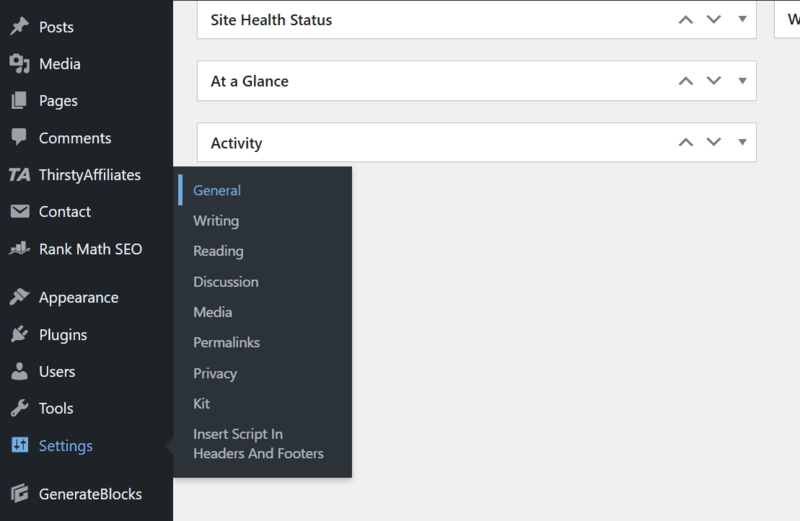
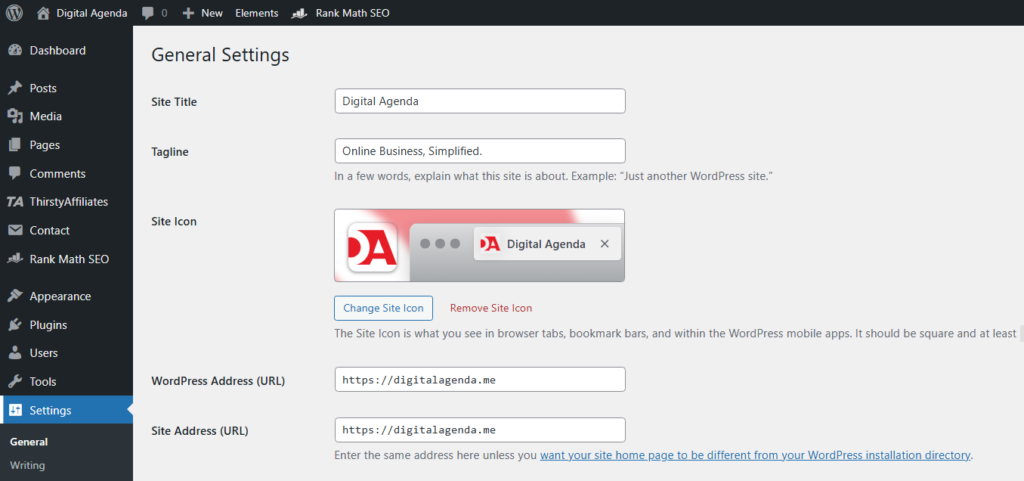
For now, let’s start by heading to Settings > General.
Site title and tagline: Make sure your site title and tagline are accurate. If they need changing, you can easily edit them here.
Your tagline should be a simple phrase that reflects what your blog is about. You can always come back and change it later if needed.
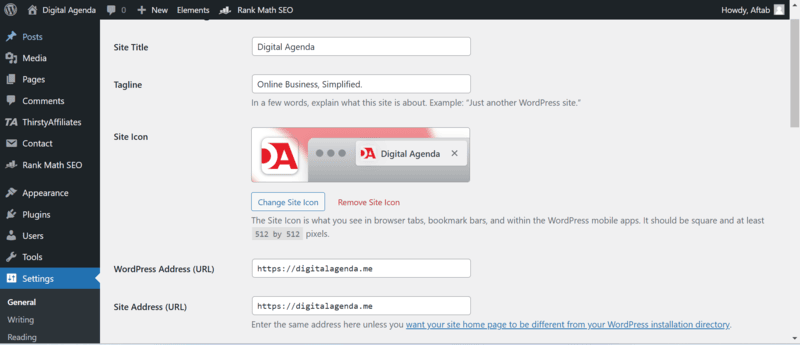
Site address: Double-check that your site starts with HTTPS:// instead of HTTP://. This is important for security. If you’re unsure about this, don’t hesitate to contact Hostinger support to ensure your SSL certificate is active and working properly.
Admin email: If you need to change the admin email, just enter the new one. Don’t forget to confirm it. Make sure the email is active to receive all important notifications.
- Membership: Leave this unchecked unless you want to allow visitors to register as members. If not, there’s no need to worry about it.
- Timezone and date: You can adjust the time zone here, but remember, it’s important for scheduling blog posts. Make sure it’s set correctly.
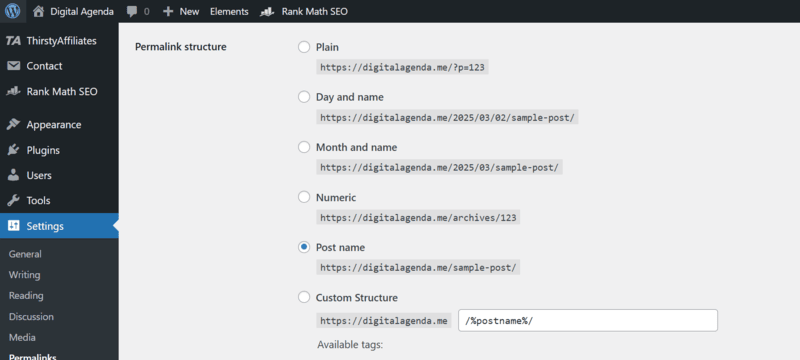
Next, head over to Settings > Permalinks and select Post name as your permalink structure. This makes your URLs clean and easy for readers (and search engines) to understand.
Don’t forget to click “Save” if you’ve made any changes
Let’s start with some essential WordPress settings. First, navigate to the Settings menu located at the bottom left of your screen.
This will take you to the settings page, where you can configure your website’s name and tagline. You can also upload your favicon here.
Once you’ve made your changes, be sure to click Save to apply them.
Step 5: Customize and Launch Your Blog
Now that your blog is set up, it’s time to give it a personalized touch. Let’s customize your blog’s design and make it truly yours.
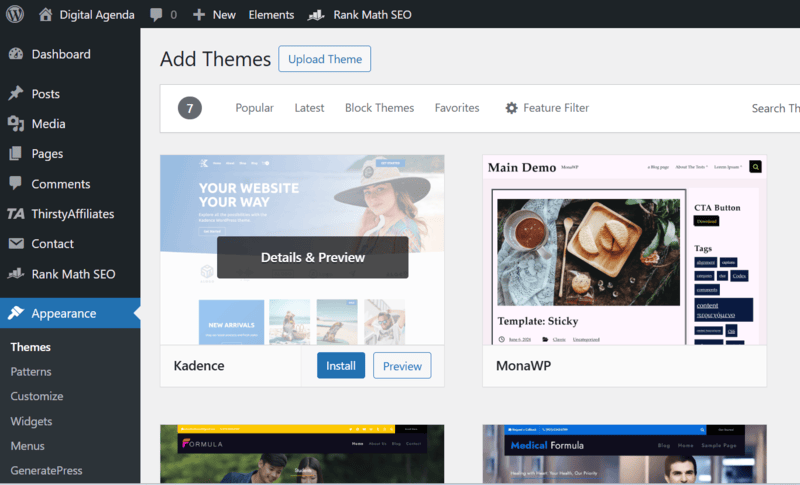
To start, go to Appearance > Themes > Add New. Here, you can browse through thousands of free themes and select the one that fits your vision.
If you’ve already bought a premium theme from a third-party provider, you can easily upload it here.
What are WordPress Themes?
WordPress themes are templates that control how your blog looks. They make it easy to change the overall style and layout without touching any code.
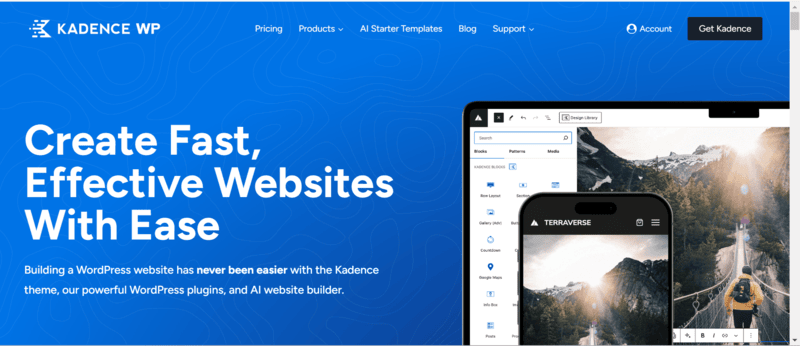
One theme I really like is Kadence Theme. It’s a powerful and flexible theme that looks great on all devices, whether it’s a desktop, tablet, or mobile phone.
Plus, Kadence offers both a free version with plenty of useful features and a paid version (Kadence Pro) if you want even more customization options.
And if you’re planning on running more blogs in the future, they have a Lifetime Full Bundle, which is an awesome deal!
If you’re looking for an alternative, Astra Theme and GeneratePress are also solid choices. They offer similar features and are known for being fast and reliable.
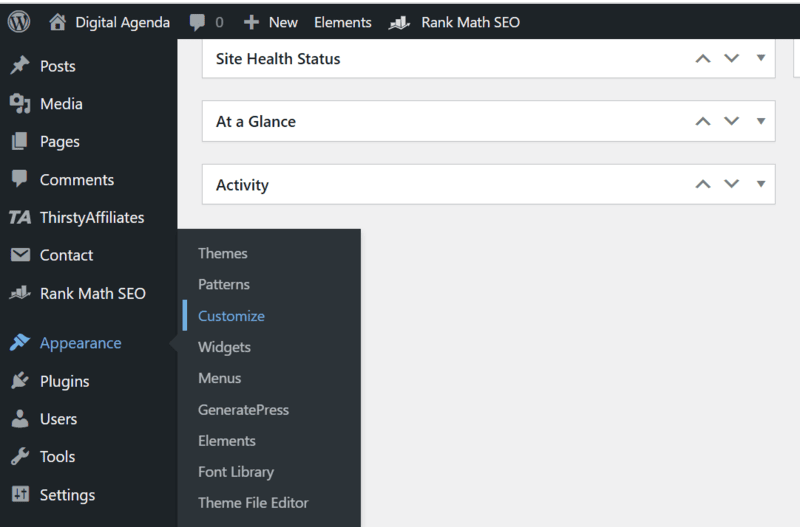
Once you’ve chosen and activated your theme, head over to Appearance > Customize to tweak the design.
The WordPress Customizer is a great tool that lets you see your changes in real time. You can adjust everything from the header and footer to the layout and sidebar, all without needing to write any code.
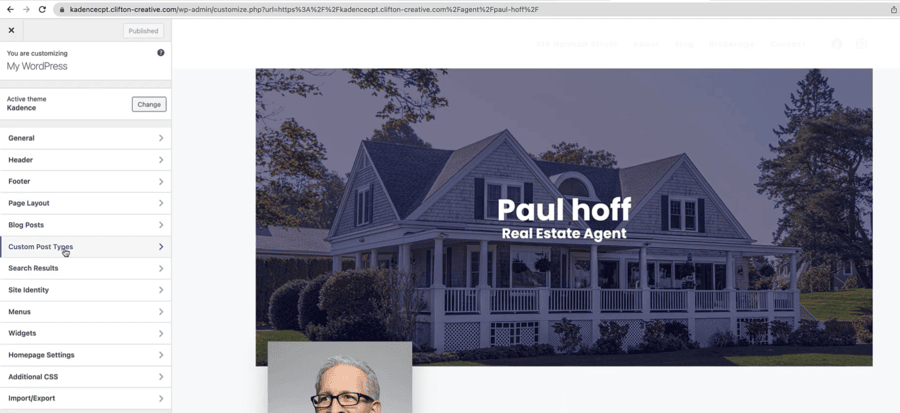
I get that this might feel overwhelming at first, but trust me, I’ve been there, too. Take your time and explore the options, and you’ll find it’s much easier than it looks.
Once you’ve finished customizing, don’t forget to publish your site so it’s visible to everyone.
Use tools like Tailor Brands to design a logo for your site, then enter your domain in your browser to see the final result. Or check out my detailed guide on how to make your business Logo easily as a beginner, right here.
Start Writing Your First Blog Post
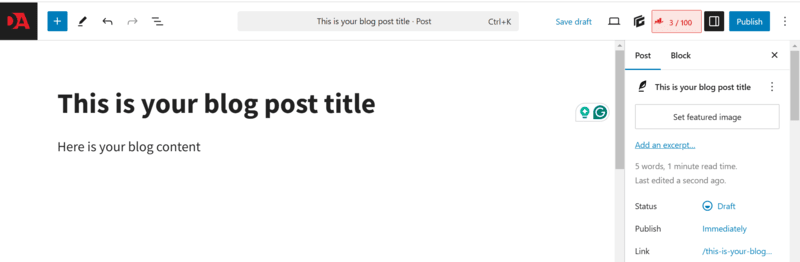
With your blog looking the way you want it, it’s time to create your first post. Don’t worry about making it perfect right away.
Just start writing about something related to your blog’s topic. It doesn’t have to be long; just write what comes to mind.
If you’re feeling unsure about where to start, I’ve got your back. Check out this guide on how to write your first blog post, where I walk you through everything you need to know as a beginner.
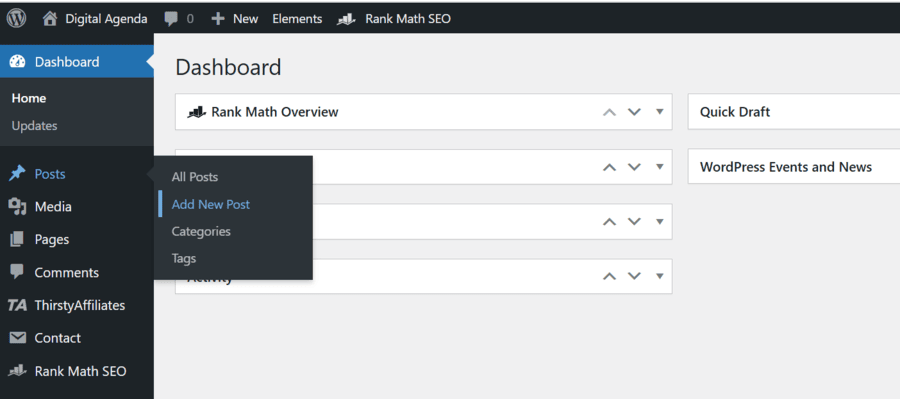
To create a new post, simply go to Posts > Add New in the WordPress dashboard. You can always come back to edit it later, so there’s no rush to make it perfect from the start.
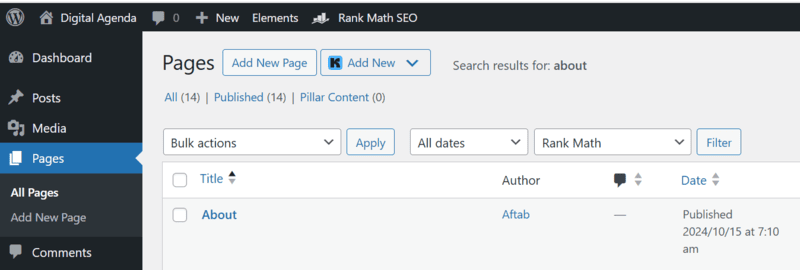
Important Pages to Add
Along with your blog posts, it’s also important to add some key pages to your blog. These pages provide essential information and make your blog look more professional. You should definitely have:
- About Page
- Contact Page
- Privacy Policy Page
- Terms of Service Page
- Disclaimer Page
Creating these pages might seem tricky at first, but don’t worry, Websites like CookieYes can help you generate a Privacy Policy page with just a few clicks, which is perfect for beginners.
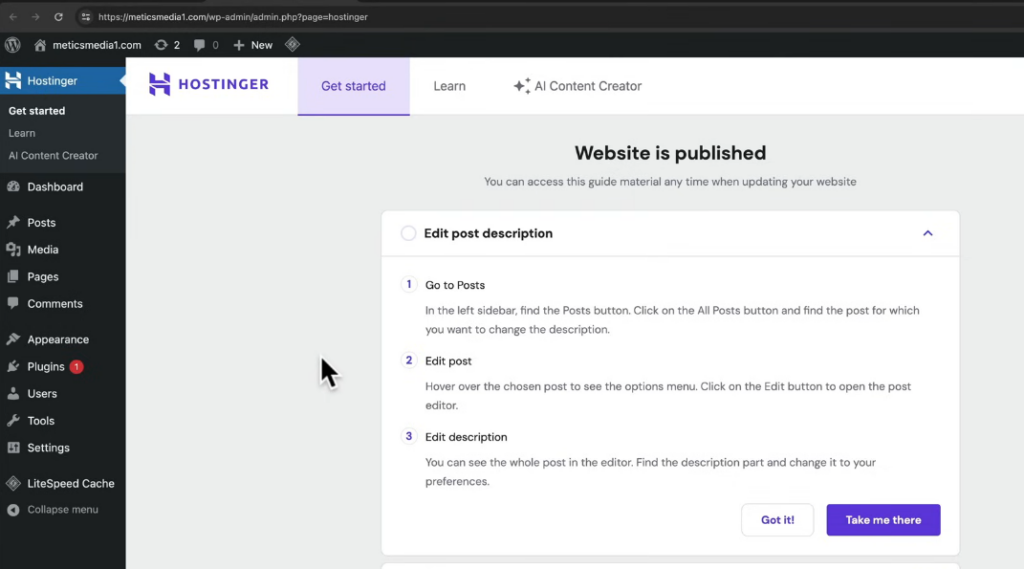
Remove the “Coming Soon” Page
Before we launch your blog to the world, there’s one last thing to take care of. Your hosting provider, Hostinger, might have set up a “Coming Soon” page by default. We need to remove it to make your blog live!
Here’s what to do:
- Log in to your WordPress dashboard (just go to yourdomain.com/wp-admin).
- Navigate to Settings > General.
- Scroll down to find the Coming Soon Page option and turn it off.
- Click Save.
Now, open a new browser tab, type in your domain name, and there you go. Your blog is live and ready for the world to see.
Setting up your SEO Plugin
Now, let’s get your blog ready to be found by search engines. The first thing I recommend is installing the RankMath SEO plugin.
It’s a fantastic tool that helps optimize your blog posts for search engines so you can attract more readers from places like Google and Bing.
To install RankMath SEO:
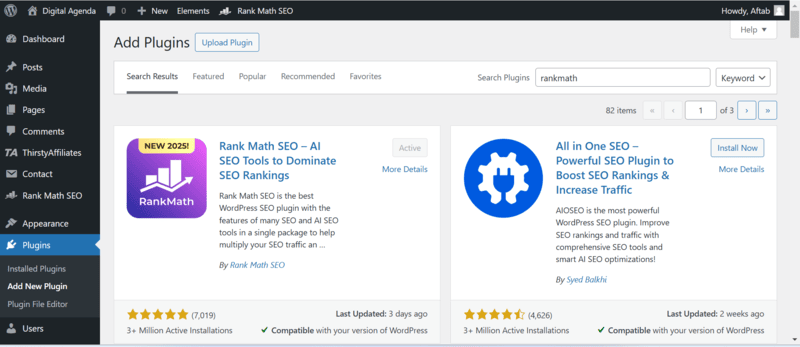
- Go to Plugins > Add New.
- Search for “RankMath SEO” in the search bar.
- Click Install Now, then Activate it.
In addition, I suggest installing a couple more essential plugins:
- WordFence to protect your blog from potential security threats, and
- Contact Form 7 to easily add a contact form to your site.
The great thing about WordPress plugins is that they often come with setup guides, so don’t worry about getting lost during the process.
Congratulations, You Did It
I’m so excited for you,
Your blog is officially live, and you’re now the proud owner of a self-hosted WordPress site. You’ve done the hard work, and now it’s time to share your passion with the world.
Conclusion: What’s Next for Your Blog?
Now that your blog is set up and ready to go, it’s time to focus on writing content that truly helps your audience and brings them back for more.
As a beginner blogger, I recommend starting by writing in a way that feels comfortable for you. Don’t worry about getting everything perfect from the beginning.
You’ll improve with every post you write. Experiment with different writing styles, topics, and formats to see what resonates with your readers.
One thing I did early on was check out other blogs in my niche. It gave me a better understanding of what my audience was interested in and what type of content works.
This is something I still do to this day. It’s a great way to stay inspired and keep your content relevant.
Another tip that worked wonders for me was using Pinterest to share my content. It’s an amazing platform for driving free traffic to your blog.
When I started using Pinterest, I noticed a big increase in the number of visitors coming to my blog. If you’re not sure how to get started with Pinterest, check out my guide on Pinterest for Bloggers.
Focus on Content Before Monetization
It’s easy to get excited about making money from your blog, but I’d advise you to focus on creating great content first.
When you start a blog, the most important thing is building a loyal audience. The money will come later. I know this from personal experience.
Once your blog starts gaining traction and you have a steady stream of readers, you can begin exploring ways to monetize it.
There are platforms like Journey by Mediavine that allow you to earn money by displaying ads on your blog. The best part is that you can start monetizing your blog even while it’s still growing, which is amazing for beginners.
However, don’t expect to earn thousands of dollars right away. Building a blog that makes money takes time and effort. The key to success is consistently providing value to your readers.
Tools to Help Your Blog Grow
Tools to Help Your Blog Grow
Here are some tools that have been incredibly helpful to me in growing my blog, and I think you’ll find them useful, too:
If you’re like me, designing a logo from scratch might feel overwhelming, especially if you don’t have any graphic design skills. That’s where Tailor Brands comes in.
This AI-powered logo maker allows you to create a professional logo in minutes. Just enter your blog’s name, pick a style you like, and let the tool do the work.
It’s simple, fast, and perfect for beginners who want a sleek, custom look without hiring a designer.
If you want people to find your blog on Google, you need to set up Google Search Console. It helps you monitor how your site appears in search results and provides useful data on keywords, search rankings, and website performance.
It’s free and essential for getting organic traffic to your blog. I set up Search Console early on, and it made a huge difference in my ability to improve my blog’s SEO.
Great visuals make a huge difference in how professional your blog looks. I personally use Envato Elements because it gives me unlimited access to high-quality stock photos, fonts, graphic templates, video templates, and even music.
Whether you need images for your blog posts or templates for social media, this platform has everything you need to create stunning content effortlessly.
If you’re serious about blogging, building an email list should be one of your top priorities. Kit makes it easy to collect emails, send automated sequences, and build a loyal audience.
Unlike other email marketing platforms, ConvertKit is designed specifically for creators and bloggers, making it simple to create opt-in forms and nurture your readers with valuable content.
This is a must-have tool for tracking your blog’s performance. It helps you understand how visitors are interacting with your content, which pages are getting the most traffic, and much more. Setting up Analytics on your blog is simple, and you can follow my easy guide to get started.
Managing a blog isn’t just about writing content, it’s also about keeping your site running smoothly. WP Buffs offers 24/7 WordPress support, helping you with updates, security monitoring, and performance optimization. If you ever run into technical issues or want peace of mind, this service is worth considering.
If you ever need help with any of these tools, you can always reach out to Hostinger for support or use the WordPress forum for advice on specific themes or plugins. I’ve found both to be very helpful throughout my blogging journey.
Time to Start Your Blog
So, what are you waiting for?
It’s your turn to start blogging, I can’t wait to see where your journey takes you.
Remember, blogging is a marathon, not a sprint. Keep learning, keep creating, and soon you’ll see the results of your hard work.
Start your Blog with Hostinger
Meet Hostinger, one of the popular web hosting platforms in the world, founded in 2004 with almost 29 million customers worldwide trusting their services.
Get startedFast and secure web hosting