
Are you ready to launch your own website in 2025 without needing to learn complex coding? You’ve arrived at the right page. Making a website has never been easier, even if you’re a complete beginner.
Gone are the days when you needed to hire a web developer or spend hours learning technical jargon.
Thanks to modern website builders and user-friendly tools, anyone can build a professional-looking website on a budget—no coding skills required.
In this step-by-step guide, I’ll walk you through how to create a website from scratch in 2025.
Whether you’re starting a personal blog, a business site, or an online store, I’ll show you exactly what you need to get started without any complicated techy stuff or unnecessary costs.
So, grab a cup of coffee, and let’s get started on your journey to building your very own website.
Disclosure: This post contains affiliate links, so if you make a purchase, I’ll earn a commission at no extra cost to you.

How to Make a Website – 3 Simple Steps
Creating a website might sound daunting, but when broken down into three simple steps, it’s easier than you might think.
Whether you’re aiming for a personal blog or a fully functional business site, these three steps will guide you through the process of making your website accessible, user-friendly, and ready for the world to see.
- Choose a website builder platform
- Get your domain name and web hosting plan
- Set up and build your website
A domain name is basically the name of your website e.g. (yourwebsite.com). Web hosting is a storage where all your website’s files are stored.
Once these three steps are done, you’ll have a live website that’s ready for the world to explore.
Start Selling Online with Shopify
Learn how to set up your store, manage products, and start selling online effortlessly.
Step 1: Choose a Website Builder Platform
The foundation of any great website starts with choosing the right platform, and in 2025, WordPress will remain the go-to choice for many.
In fact, it powers a significant portion of the internet because of its versatility, ease of use, and vast customization options.
For this guide, we’ll be using WordPress to create your site. Why? Because it’s beginner-friendly, offers endless possibilities for growth, and works seamlessly with custom domain names and hosting services.
By the end of this guide, you’ll have a fully functional, self-hosted WordPress website that’s uniquely yours, complete with a custom domain name that reflects your brand or idea.
Step 2: Get your Web Hosting and Domain Name
Now that we’ve chosen your platform, it’s time to set the stage for your website to go live. A domain name and web hosting are essential for this step.
There are many reliable web hosting providers, but Hostinger is a popular choice for beginners. They offer affordable hosting plans, a free domain name for the first year, and seamless integration with WordPress.
This means you can set up your website quickly without any technical hurdles.
→ Click here to head over to Hostinger and hit the “Claim deal” button

I recommend checking out the link below, where you can have an additional 10% discount on Hostinger’s already discounted prices by using my promo code.
Once you click on the link, you’ll be directed to Hostinger’s page. From there, click on the “Claim Deal” button, which will take you to their hosting plans.
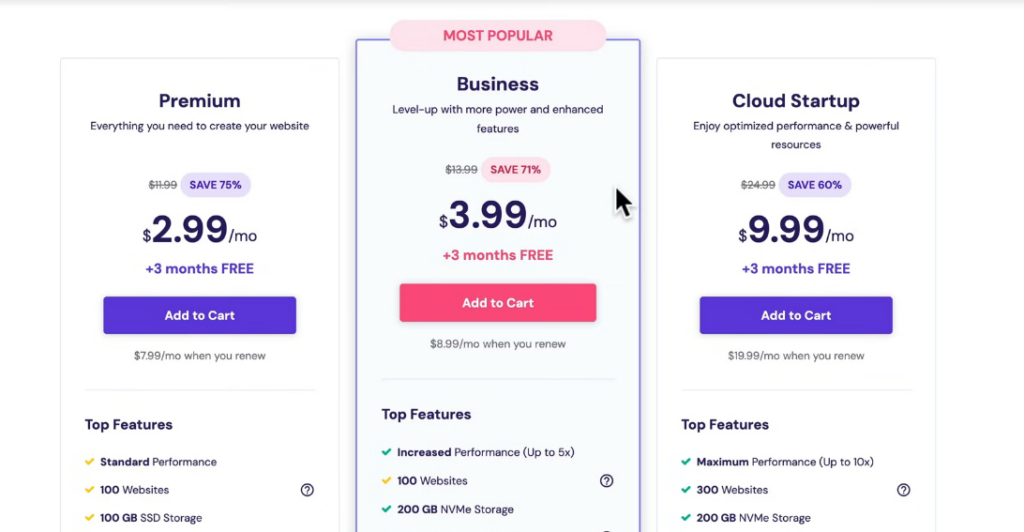
When choosing a hosting plan, I suggest going with either the Premium plan or the Business plan. The key difference between these two is the CDN feature included in the Business plan.
This feature stores your website’s data on multiple servers around the world, which improves your site’s load time and overall performance.
If you’re aiming for the best performance, the Business plan is ideal. However, if you’re on a tighter budget, the Premium plan is still an excellent choice.
For this guide, I’ll use the Business plan and proceed by clicking “Add to Cart.”
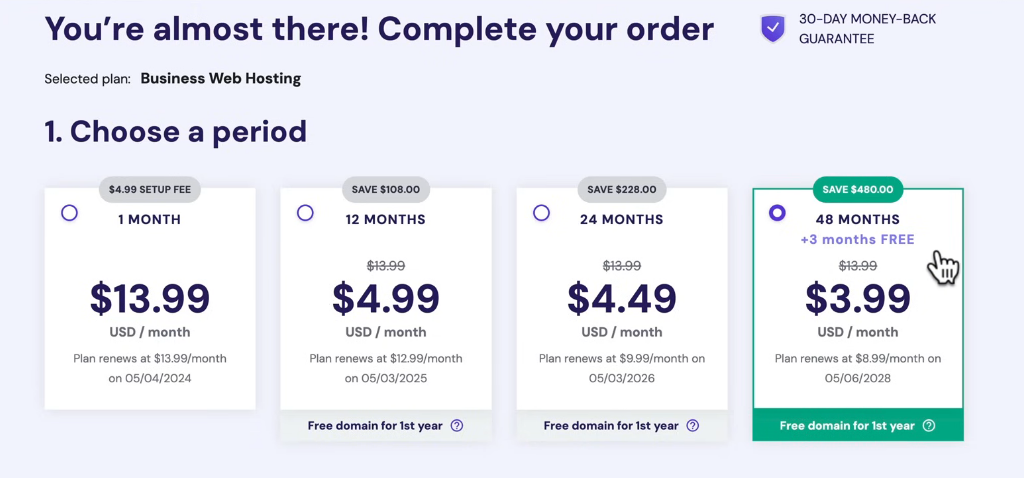
Next, you’ll need to select your payment period, which determines how many months of hosting you pay for upfront. Generally, the longer the payment period, the lower the average monthly cost.
The best value comes with the 48-month plan, which averages out to just $3.99 per month for four years. After the initial term, it renews at $8.99 per month, which is still competitive.
Just keep in mind that the one-month option doesn’t include a free domain for the first year and adds a $5 setup fee, making it less ideal.
Hostinger
Meet Hostinger, one of the popular web hosting platforms in the world, founded in 2004 with almost 29 million customers worldwide, trusting their services.
Get startedFast and secure web hosting
The 48-month option, however, is a solid choice for those looking for affordability and flexibility.
For demonstration purposes, I’m selecting the 12-month plan. Once you’ve made your choice, the next step is creating your account.
Simply enter your email address, choose a secure password. After that, select your preferred payment method, fill in the necessary details, and click “Submit Secure Payment.”
Here, just click on the Hostinger logo at the top and it will take you to your H Panel. Now it’s time to set up your domain name, which will serve as your website’s address.
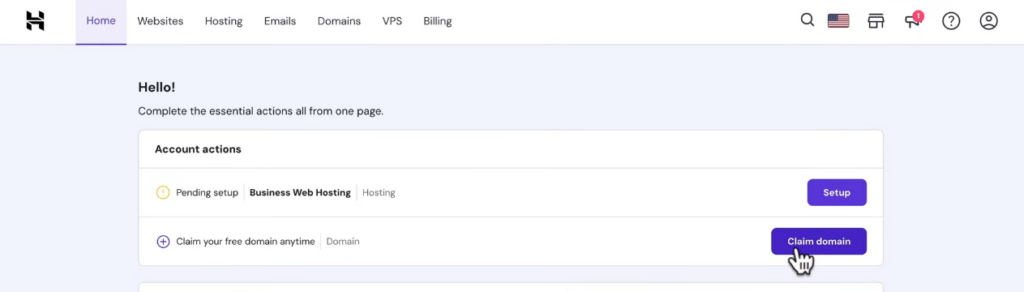
Since Hostinger includes a free domain for the first year with plans of 12 months or longer, you can claim it during this step.
Click on “Claim Domain” and search for a name that represents your website. If you’re building a personal site, yourname.com is a great option.
For businesses, use something like yourcompanyname.com. Keep the domain short, simple, and memorable. If your preferred name is unavailable, try alternative extensions like .net or get creative with slight variations.
For example, if digitalagenda.com is taken, you might try digitalagenda.me.
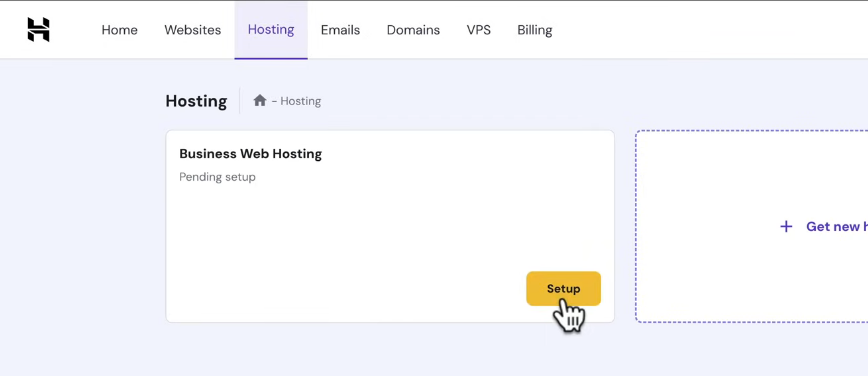
Once you find an available domain that fits your needs, go ahead and claim it. With your hosting and domain in place, you’re ready to start building your website. From the top menu, switch to Hosting, and click setup to setup your website.
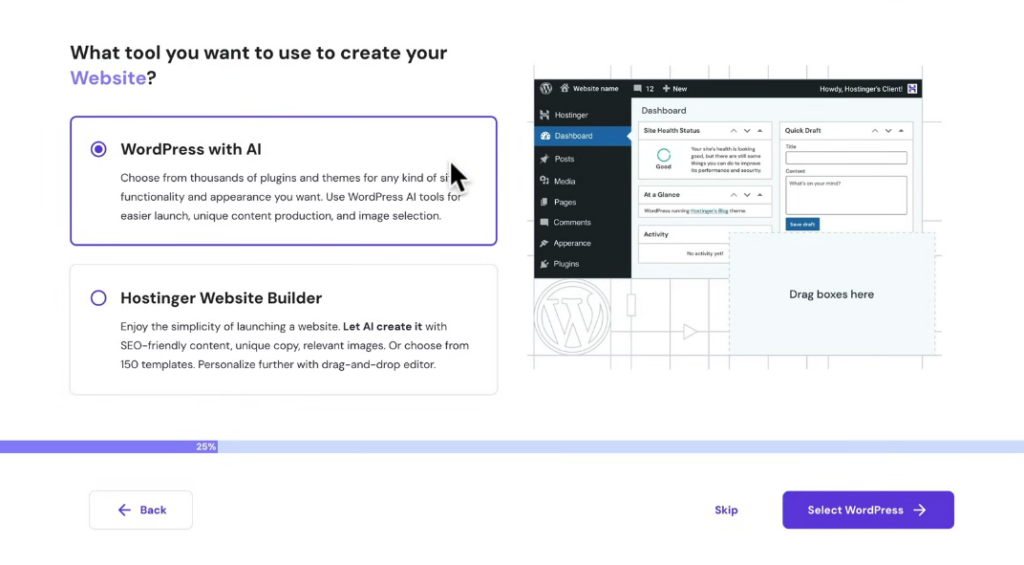
Here, you can choose from WordPress, or Hostinger website builder, so choose WordPress as we’re building our website with a popular CMS WordPress. And then click Select WordPress.
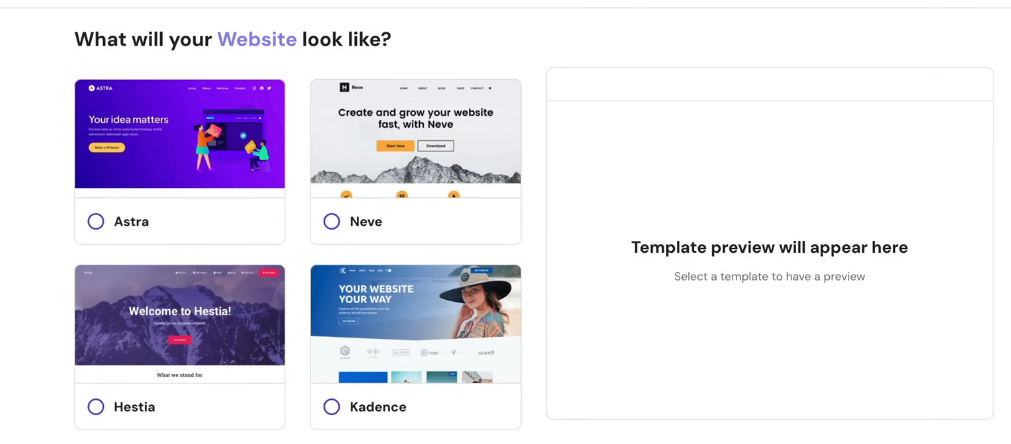
Now you’ll need to set the password for your website and pick a WordPress theme, now you might be thinking what the Theme is. this is a layout template of your website. So, choose one or skip this step for now, and it
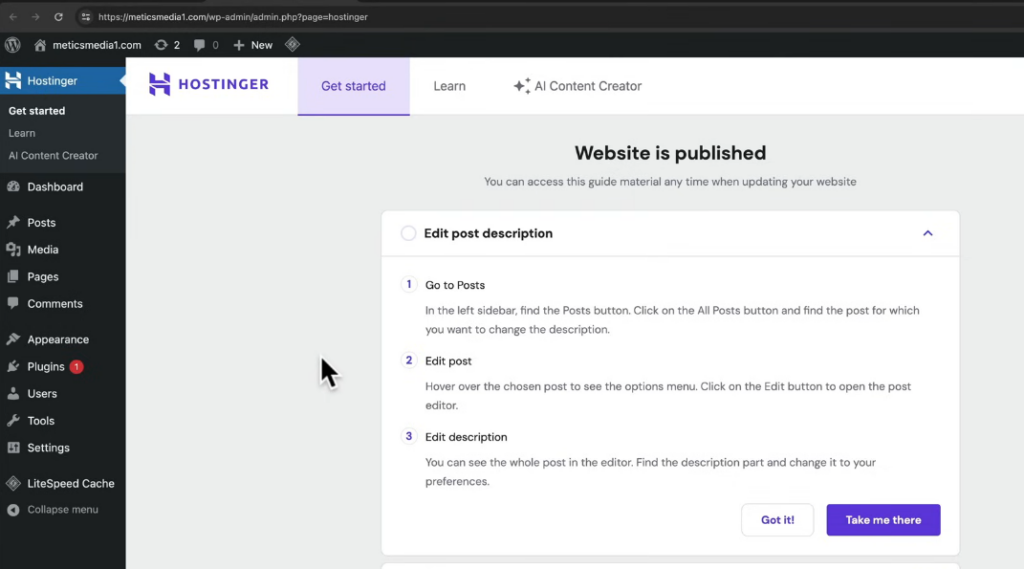
Next, access the WordPress dashboard by clicking “Admin Panel” in the Hostinger dashboard. This is the backend of your website, where you’ll make changes and updates.
To quickly access it in the future, type your website URL followed by /wp-admin in your browser. Bookmark this link for easy access.
Don’t forget to click “Save” if you’ve made any changes
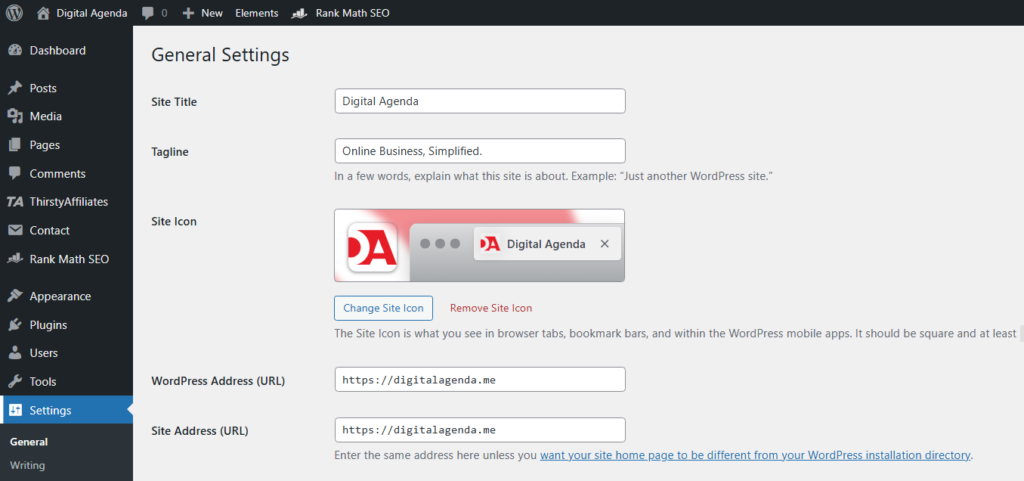
Let’s start with some essential WordPress settings. First, navigate to the Settings menu located at the bottom left of your screen.
This will take you to the settings page, where you can configure your website’s name and tagline. You can also upload your favicon here.
Once you’ve made your changes, be sure to click Save to apply them.
Step 5: Customize and Launch Your Blog
Now that your blog is set up, it’s time to give it a personalized touch. Let’s customize your blog’s design and make it truly yours.
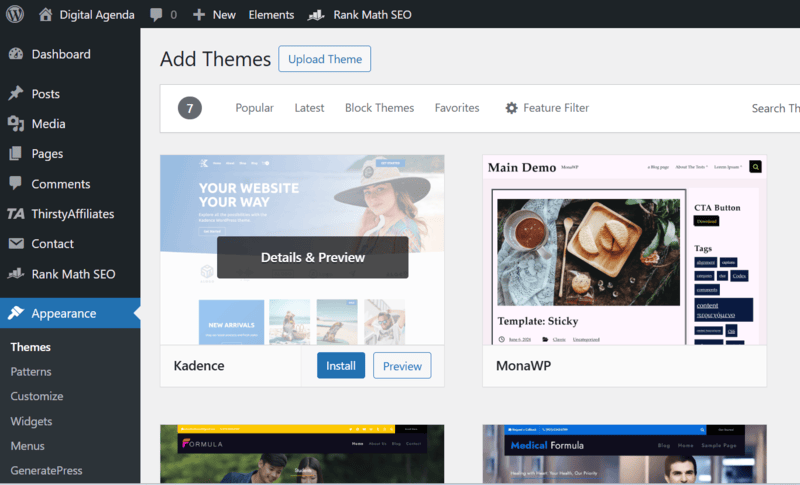
To start, go to Appearance > Themes > Add New. Here, you can browse through thousands of free themes and select the one that fits your vision.
If you’ve already bought a premium theme from a third-party provider, you can easily upload it here.
What are WordPress Themes?
WordPress themes are templates that control how your blog looks. They make it easy to change the overall style and layout without touching any code.
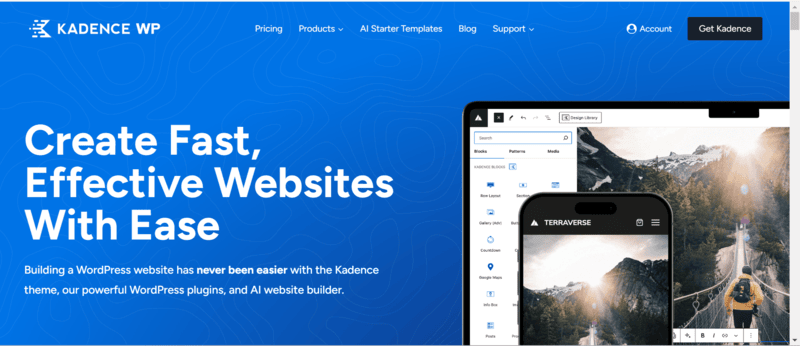
One theme I really like is Kadence Theme. It’s a powerful and flexible theme that looks great on all devices, whether it’s a desktop, tablet, or mobile phone.
Plus, Kadence offers both a free version with plenty of useful features and a paid version (Kadence Pro) if you want even more customization options.
And if you’re planning on running more blogs in the future, they have a Lifetime Full Bundle, which is an awesome deal!
If you’re looking for an alternative, Astra Theme and GeneratePress are also solid choices. They offer similar features and are known for being fast and reliable.
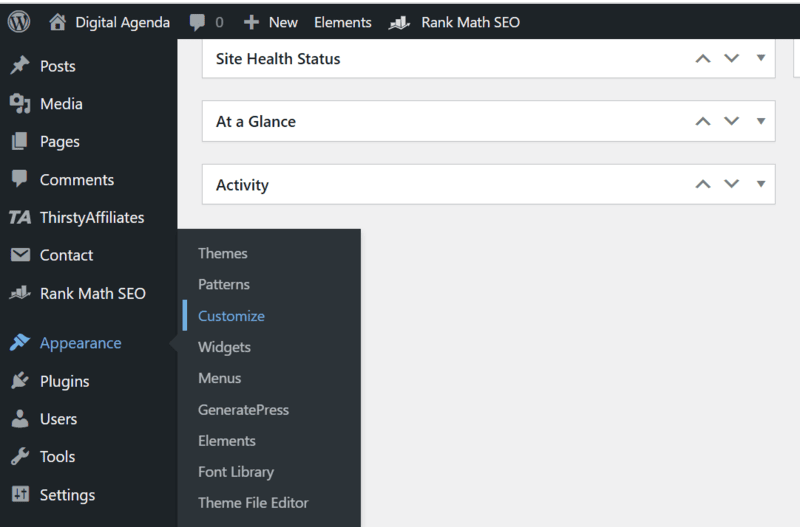
Once you’ve chosen and activated your theme, head over to Appearance > Customize to tweak the design.
The WordPress Customizer is a great tool that lets you see your changes in real time. You can adjust everything from the header and footer to the layout and sidebar, all without needing to write any code.
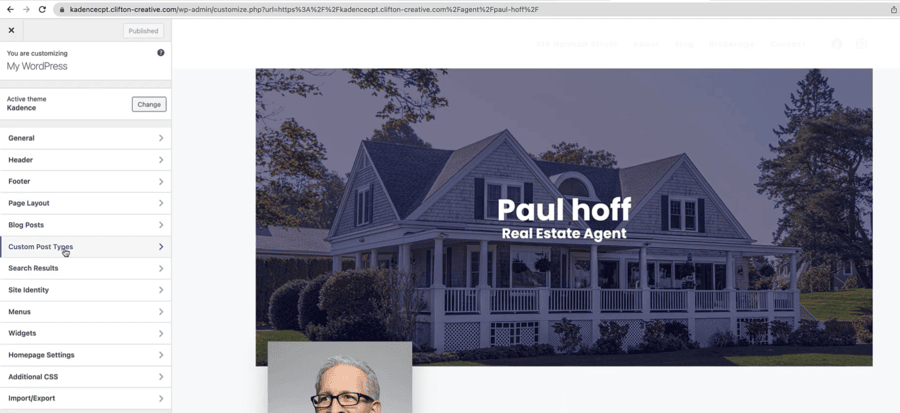
I get that this might feel overwhelming at first, but trust me, I’ve been there, too. Take your time and explore the options, and you’ll find it’s much easier than it looks.
Once you’ve finished customizing, don’t forget to publish your site so it’s visible to everyone.
Use tools like Tailor Brands to design a logo for your site, then enter your domain in your browser to see the final result
Important Pages to Add
Along with your blog posts, it’s also important to add some key pages to your blog. These pages provide essential information and make your blog look more professional. You should definitely have:
- About Page
- Contact Page
- Privacy Policy Page
- Terms of Service Page
- Disclaimer Page
Creating these pages might seem tricky at first, but don’t worry, Websites like CookieYes can help you generate a Privacy Policy page with just a few clicks, which is perfect for beginners.
Remove the “Coming Soon” Page
Before we launch your blog to the world, there’s one last thing to take care of. Your hosting provider, Hostinger, might have set up a “Coming Soon” page by default. We need to remove it to make your blog live!
Here’s what to do:
- Log in to your WordPress dashboard (just go to yourdomain.com/wp-admin).
- Navigate to Settings > General.
- Scroll down to find the Coming Soon Page option and turn it off.
- Click Save.
Now, open a new browser tab, type in your domain name, and there you go. Your blog is live and ready for the world to see.
Congratulations, You Did It
I’m so excited for you,
Your blog is officially live, and you’re now the proud owner of a self-hosted WordPress site. You’ve done the hard work, and now it’s time to share your passion with the world.
Tools to Help Your Blog Grow
Here are some tools that have been incredibly helpful to me in growing my blog, and I think you’ll find them useful, too:
If you’re like me, designing a logo from scratch might feel overwhelming, especially if you don’t have any graphic design skills. That’s where Tailor Brands comes in.
This AI-powered logo maker allows you to create a professional logo in minutes. Just enter your blog’s name, pick a style you like, and let the tool do the work.
It’s simple, fast, and perfect for beginners who want a sleek, custom look without hiring a designer.
If you want people to find your blog on Google, you need to set up Google Search Console. It helps you monitor how your site appears in search results and provides useful data on keywords, search rankings, and website performance.
It’s free and essential for getting organic traffic to your blog. I set up Search Console early on, and it made a huge difference in my ability to improve my blog’s SEO.
Great visuals make a huge difference in how professional your blog looks. I personally use Envato Elements because it gives me unlimited access to high-quality stock photos, fonts, graphic templates, video templates, and even music.
Whether you need images for your blog posts or templates for social media, this platform has everything you need to create stunning content effortlessly.
If you’re serious about blogging, building an email list should be one of your top priorities. Kit makes it easy to collect emails, send automated sequences, and build a loyal audience.
Unlike other email marketing platforms, ConvertKit is designed specifically for creators and bloggers, making it simple to create opt-in forms and nurture your readers with valuable content.
This is a must-have tool for tracking your blog’s performance. It helps you understand how visitors are interacting with your content, which pages are getting the most traffic, and much more. Setting up Analytics on your blog is simple, and you can follow my easy guide to get started.
Managing a blog isn’t just about writing content, it’s also about keeping your site running smoothly. WP Buffs offers 24/7 WordPress support, helping you with updates, security monitoring, and performance optimization. If you ever run into technical issues or want peace of mind, this service is worth considering.
Conclusion
There’s so much more you can learn and explore to grow your online presence. Check out more guides on my site for tips on blogging, website building, and scaling your online business.
Looking to start your own blog? Check out our detailed guide on setting up your WordPress blog, from the very first step to customizing your site.
Whether you’re a complete beginner or looking for tips to fine-tune your settings, this post has everything you need to get started.
Start your Website with Hostinger
Meet Hostinger, one of the popular web hosting platforms in the world, founded in 2004 with almost 29 million customers worldwide, trusting their services.
Get startedFast and secure web hosting